
Wow, more than a year without writing anything more, and even leaving a three-part blog post unfinished… So what happened?
Well, I started a new job, which requires a lot of focus as the beginning is crucial. All the time I had for starting the blog and writing the first articles was indeed because I already had left the old one and was waiting for the new job.
A year of many interesting things has passed, and many times I had the desire to write about several different things. But having first to finish the trilogy prevented me to tell what I wanted to tell at that particular time. Then this major vulnerability has become water in the river and people seem to not care so much anymore.
So I’ve decided I will at least create an abstract theoretical post to close the topic. That way I can continue writing about other things.
Ok, so if you are here is because you are interested in the Log4j 2 vulnerability, at least from a historical standpoint, and as a way to apply “lessons learned” to your current process.
To learn more about Log4j and vulnerabilities, don’t forget to visit also my other posts:
The two big questions that I will answer in this post are:
- How could this be prevented or mitigated?
- How should you proceed once a situation like this is detected?
I’ll set up problems in a generic way, but focus on Kubernetes for specific examples.
1. Prevention and mitigation
A zero-day like this vulnerability, by definition, can’t be detected in advance. So it’s impossible to know it’s there. But some things can be done to detect their behavior and contain their reach, like:
- Avoid cluster misconfiguration
- Less and better dependencies
- Runtime detection
- Network segmentation
- Encrypting network traffic
- Process containment
Avoid starting with a vulnerable cloud or cluster setup
Misconfiguration in your infrastructure for how you are provisioning cloud resources or how you are configuring a cluster is the number one reason for breaches. Check you employ known best practices for your cloud provider. Remember misconfiguration on infrastructure or cloud usage is not in the scope of vulnerability databases, it’s completely on you. You can download Center for Internet Security (CIS) Benchmarks with security recommendations for AWS, GCP, Azure, Kubernetes, Openshift, and many other platforms, and use automated tools for checking like Kubebench, or Prowler. You can also check IaC (Infrastructure as Code) with tools like Checkov for bad practices that make you vulnerable.
Vulnerability databases only cover “software that you install”, for problems people report. But there are also cloud vulnerability databases like secwiki.cloud (cloud vulnerability wiki), and cloudvulndb.org.
Less and better dependencies
Although we will speak about a lot of security concerns, the focus in this post is vulnerabilities. They can live in your software, on libraries and external dependencies you use, and you may not know it. One way of reducing risk is… running less software!
Specifically for container images, you should wisely choose your base images so they have the least packages possible, and those that have to be there to be very carefully chosen. A good starting point is using distroless container images and statically compiling your software. If that is not possible, consider not all base images are the same. Try to start with a small Alpine or Debian-slim. If you don’t want to craft all dependencies inside the image yourself, consider the ones from Bitnami are sometimes better (less unnecessary dependencies and vulnerabilities) than the official images from open-source projects. Other alternatives like Chainguard have an enticing promise of zero vulnerabilities in their images that is worth putting to the test.
Also the quality of your dependencies is important, you should choose carefully which dependencies written by other people you execute alongside your software. Make sure they come from reputable sources, open-source projects with many maintainers that regularly release new versions and fix issues. That will reduce the amount of vulnerability they have, and the time for a new one to be addressed.
When you reference base container image, and you build your own, make sure you always pin the tag version of the image, or even better, reference the SHA-256 digest that will prevent a mutated tag (different image with the same tag) to be used. Reproducible builds are important for security, accountability and troubleshooting.
Frequent and quick updates
If you update your software dependencies frequently you may avoid altogether vulnerabilities; or if a vulnerability has already been discovered in software that you use, if you can replace it very quickly you can skip being impacted by it. The key is having an automated way to build new versions of container images, check their vulnerabilities (more on this later), test and deploy them in a controlled manner, and automatically monitor the new deployments to check if it works well.
You can automate container image build using automated build systems from your cloud provider (AWS, GCP, Azure), or using open-source tools that run in your own cluster like ArgoCD or Tekton.
Automated deployment strategies that checks if everything went well, and automatically roll back otherwise, include canary deployemnts](https://learn.microsoft.com/en-us/azure/devops/pipelines/ecosystems/kubernetes/canary-demo?view=azure-devops&tabs=yaml) and blue-green rolling update deployments. For this to succeed, you must implement good readiness and liveness probes in your pods.
Runtime detection
Even if you don’t know about a vulnerability, you can use runtime detection to examine the behavior of compute elements looking for suspicious activity. A tool like open-source Falco can be installed as an eBPF or Kernel module for hosts, containers, or Kubernetes. It has an extensive set of more than 80 curated rules that would detect undesirable activity once someone is exploiting a zero-day, like running an interactive shell, searching for passwords or certificates, exfiltrating them, or trying to break security boundaries. Alternatives like Tetragon looks interesting, leveraging just eBPF, but you lack any starting point for security rules and have to write everything from scratch. It has a great capability of being able to stop a process just after a detection, but it has been disclaimed this is as useful as it sounds.
Network segmentation
When you initially set up your Kubernetes container, it’s easy for learning purposes that every pod is exposed directly to the Internet, including the control plane API. This is also a very insecure situation that would be an important thing to address related to the misconfigurations we mentioned at the beginning of this post. Ensure you are running the cluster network layout is private and traffic has to come from and to the cluster using a gateway that you can configure so only your sanctioned load balancers make access to destination pods that you have specified as frontend services.
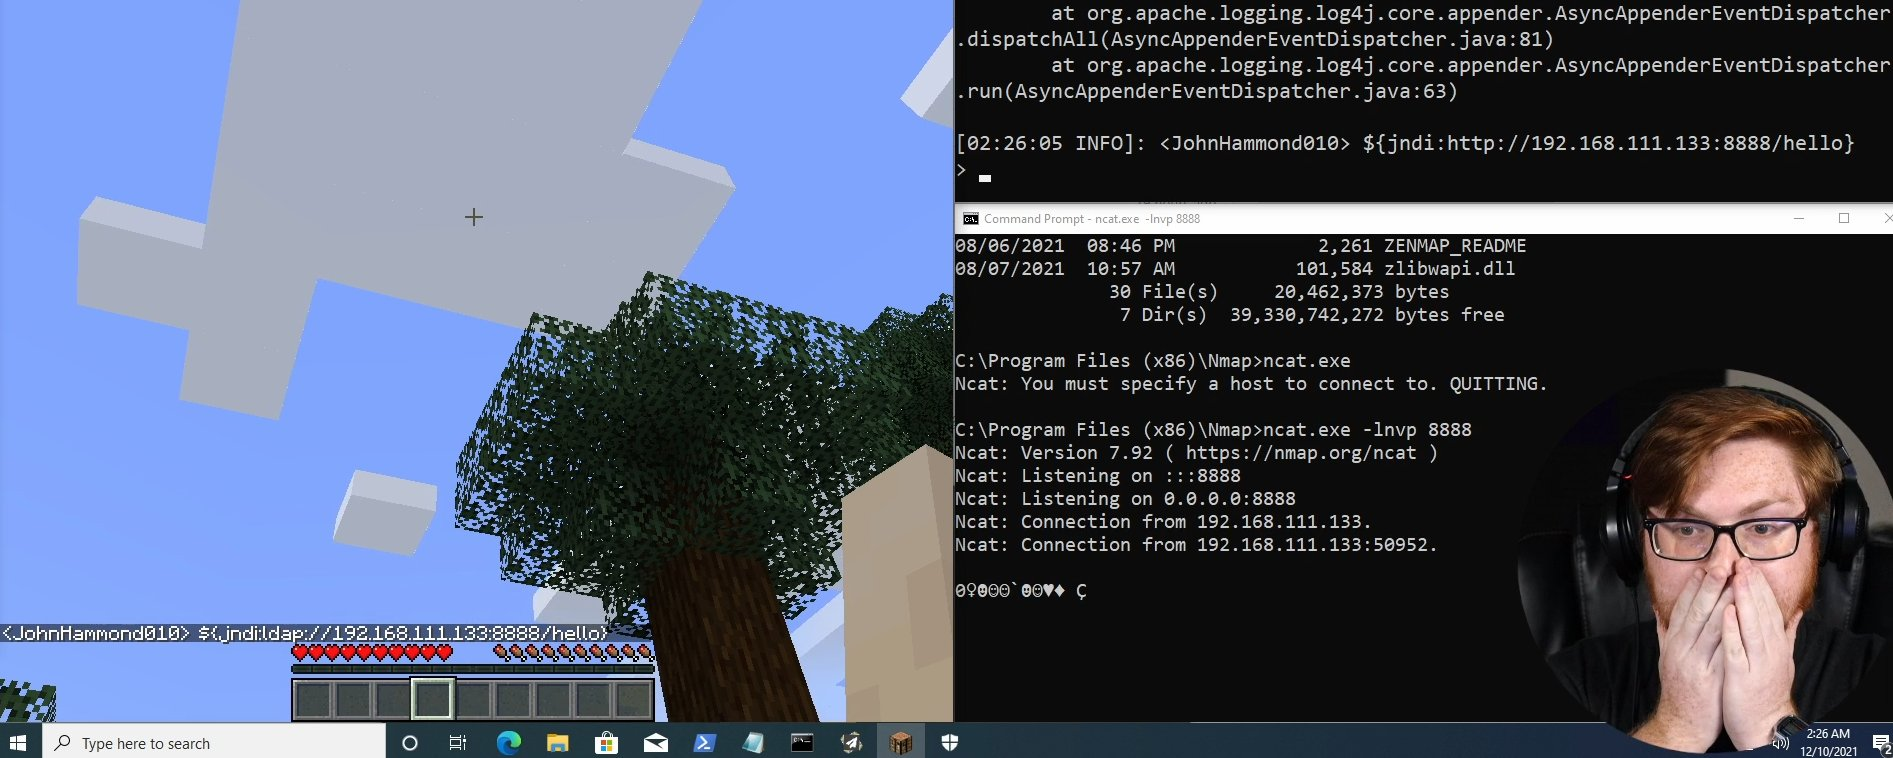
Once inside your cluster, by default, every pod can network connect to any other one. If you leave that this way, when one is compromised it’s possible to connect to any other one. This is what we described in my Log4j vulnerability post that was happening on several compromised services, including Apple iPhone naming server](/blog/log4j-part-i/). To limit that, in Kubernetes, you can use Kubernetes Network Policies (KNP) to easily set how pods can talk to each other. Remember that KNPs are “additive”, the first time you specify one, everything gets blocked except the kind of communication you describe; and when you include more and more KNPs, more things get allowed as the union of all policies (its impossible to “disallow” something already allowed). Also, remember that ingress and egress sections are completely different policies, so if you specify in policies rules for ingress, but you don’t include any egress section on them, that doesn’t mean you are blocking egress traffic, but that you still are allowing everything. To completely disallow one of those kinds of traffic, you have to include in at least one policy the corresponding section (“egress:” or “ingress:”) with zero rules.
Depending on the Container Network Interface (CNI) of the dataplane your Kubernetes cluster uses, you may need to activate network policies, or do additional installations, to have access to that feature; even replacing the CNI for Calico or Cilium, both of them having their own proprietary more powerful network policies. Remember that you can replace the CNI of worker nodes, but not for control plane ones that will remain under the original CNI with their own IP range, that will not know anything about pods range. If that is the case, you will need for example to run on “host network” pods with webhooks that have to be called from the Kubernetes API (but not the other way around). And pods on the host network share the IP address and network interface of the host, which at the same time can’t be controlled with normal Kubernetes Network policies.
Kubernetes Network Policies work very well to manage pod traffic inside the cluster on regular pods. But if you want to filter external traffic, when using load balancers the external source IP address of the connection may be masked. To avoid this, you can opt to lose perfect balancing vs preserving client ip by setting externalTrafficPolicy to local. It’s a good idea to use a cloud firewall when possible for rules that can apply in this case.
Encrypting network traffic
Traffic encryption will prevent any middleman in your infrastructure can listen to your communications; may it be your cloud provider, your own software, or a malicious actor that has found a vulnerability in one of your systems and wants to gather information on different ones.
A service mesh is an interesting addition that brings your cluster network better observability, better load balancing, and automated mTLS authentication and encryption. But it’s not enough for network segmentation: if it’s based on sidecars like Istio it will only proxy L7 traffic, not blocking direct ip:port communications and the proxy can be bypassed if the pod has enough privileges; and if it’s eBPF based, which can route L3 traffic, it completely lacks any network segmentation features, leaving that control to its underlying eBPF CNI and the previously discussed network policies.
If you don’t want the overhead resource cost of a service mesh, and you want end-to-end encryption (from client to pod), research how your load balancers can do SSL pasthrough to make that possible. On AWS, (Application Load Balancer (ALB)](https://docs.aws.amazon.com/elasticloadbalancing/latest/application/introduction.html) can’t do SSL passthrough. You could use Network Load Balancer (NLB) in tcp mode, but if you use AWS Load Balancer controller, you will need an NLB per service, which is costly, and will exhaust available VPC ip addresses. You could provision NLB using Terraform or CloudFormation and use different ports to different services, or create a single NLB and Nginx ingress controller.
Process containment
A computer CPU runs software in a process, many of them at the same time for parallelism. A service may run in a container, which is just a process with some isolation from other processes in the same host machine, and its own network layer.
When running containers, if the vulnerable workload gets compromised, there is already some isolation from the host that is running it, may it be on a Kubernetes cluster, or other kind of orchestrator. But if the malicious agent knows a way to escape the confinements of the container via a vulnerability in the orchestrator, which has happened in the past, he could switch to run on the host virtual machine directly. Several privileged settings for pods will enable them to run very privileged capabilities, that when it gets compromised, makes escaping the container and gaining root privileges on the host machine extremely easy. From there, the malicious agent will be able to do a lot of harm.
To prevent pods in a Kubernetes cluster from having insecure settings you can use Pod Security Standards, where you can set a namespace at three different levels:
- Privileged: anything is allowed
- Baseline: any setting that will make a direct compromise of hosts is disallowed, like privileged containers or host network.
- Restricted: containers need to run as non-root, drop almost all Linux capabilities, and specify a seccomp profile that filters system calls.
So in summary, a baseline pod may just be any regular plain pod spec YAML if it doesn’t include any special security setting in it. A restricted pod needs to have added to its securityContext these settings:
1
2
3
4
5
6
7
8
9
securityContext:
  allowPrivilegeEscalation: false
  capabilities:
    drop: ["ALL"]
    add: ["NET_BIND_SERVICE"] # Optional, the only allowed value
  runAsNonRoot: true
  runAsUser: 10000 # Optional, must not be 0
  seccompProfile:
    type: RuntimeDefault # or "Localhost"
Remember Kubernetes namespaces do not limit anything at all until you put extra limiting settings on how they behave. Don’t worry if at first, you don’t understand the implications of all these. You can start with setting baseline, as it will require mostly you to do nothing to your pod specs, otherwise you’ll know they are already insecure.
The reason to drop all capabilities is that some of them are dangerous, for example you can use CAP_NET_RAW, that is allowed by legacy reasons, to craft false IGMP packets on the node and trick other pods to use yours as a DNS proxy, intercepting traffic. NET_BIND_SERVICE is allowed in case you need to expose ports lower than 1024.
A side effect of restricted pod settings is that you can’t share the pod process namespace, so troubleshooting with kubectl debug and ephemeral containers will not be able to access the target pod process, which severely hinders its usefulness as a debug tool.
If you want to do some static analysis of your pods’ YAML PSS posture, for example for third-party Helm charts, You can use my own psa-checker open-source tool to evaluate to which PSS level the pods a chart will deploy comply with. You can also shift left and put it into a pipeline to fail early if it sees pods of the wrong level.
When you need a more fine-tuned permissions system that is not just those three levels, or enforce additional restrictions not included in them, you can install an admission controller like Gatekeeper or Kyberno, and write your own policies for them using OPA for the first or plain YAML for the second. For example, you could write rules to prevent container images that use the latest or no tag at all (something mentioned earlier here), that don’t specify resource quotas or limits (that I will talk about a little at the end of this post), or that don’t come from your sanctioned container registry.
In general an important thing you can do to improve your containers security is to make sure they do not run as root user. You can specify in the Dockerfile with USER a different user, or at least make sure that they are compatible with running the as non-root. Then on the pod spec, use runAsUser to specify a userId. That way, what a malicious actor can do inside the container will be limited to its own linux user permissions, which may not be so limiting inside its own container, but will seriously prevent spread if the container isolation is breached and the process escapes to the underlying host.
Kubernetes RBAC
When thinking of cluster orchestration for a single containerized workload, or even complex microservice architectures, is that those workloads just need to declare what they need and let the orchestrator carry the work of making it possible. But some of the cloud-native applications you can run in the cluster are to extend how the orchestrator work or your workload is complex enough to need to be aware and interact with the orchestrator. This is where Kubernetes Role Based Access Control (RBAC) comes into play to give some permissions, but not all.
As always, you should give the least permissions possible to do the job intended. Leverage roles, rolebindings, clusterrole, clustesrrolebindings, service accounts, users and groups. Remember namespaces do not limit anything at all until you put extra limiting settings on how they behave. Learn how to master this, including using subresources permissions, like pod/exec or pod/logs, and indicating specific resource names, like to which specific deployment you are giving permissions. Avoid using * (everything) anywhere, and remember that Kubernetes accepts anything for RBAC, even if the kinds have typos and do not exist… at the moment you are deploying the RBAC rules.
Some permissions require special consideration. Giving read secrets permission will allow getting tokens that can be used to authenticate to other services, facilitating lateral movement. Note there is no distinction between list secrets_ and read secrets, it’s the same permission, and even if with kubectl there is a difference, if you just directly use curl there is none. Modifying any event will allow someone to tamper with information that may be important to detect a malicious attack. Also important is pod/_exec, which would allow someone to execute a shell into containers, with the potential to insert their own malicious code, exfiltrate secret information, etc.
Every namespace has a default service account that is assigned to each pod if in their spec there is none specific, with a token to auth to the Kubernetes API that has very few permissions, just to “ask” what it can do (that will be nothing). It’s a good idea to opt out of automounting this token on all pods, as if not specifically required, pods should not even be able to talk with that API, to begin with; think that if they get compromised it can be the starting point of exploiting some Kubernetes API vulnerability. Also, someone may have the disastrous idea of starting giving permissions to that default account, which will unknownlying give those permissions to all existing and future pods created on the namespace, with unintended side effects.
Kubernetes RBAC system will not allow a user (or service account) to create a rolebinding that would give to itself or others more permissions than they currently have, which is nice to let less permissioned users create their own even least permissioned RBAC rules. But take into consideration that if you have permissions to create a pod, deployment, daemonset, job, or cronjob, in some namespace, and there is another service account in that namespace, you can create a workload tied to such service account, with the command of your choosing, triggering a de-facto privilege escalation.
Cloud providers have ways of tying cloud IAM identities with Kubernetes users and groups. Make sure you are using this the right way, usually having a role tied to a group that can be delegated to other IAM users is a common practice, configured in a configmap on the cluster. But that may make it difficult to understand when looking at logs exactly which user executed which command.
When deploying third-party workloads, like helm charts or operators, review the RBAC permissions they include, and seek alternatives if they just deploy a Clusterrole with all permissions on the cluster, as it will be a big security risk. As explained before you can psa-checker to evaluate PSS level of pods in a Helm chart. This will no tell you info about the chart RBAC rules that you have to investigate yourself, but at least will tell you if the pods already are restricted to insecure process containment. And you can use the open-source tool bad robot to evaluate the security posture of operators, including their RBAC rules.
2. Detection and fix
The only way to detect if you are using a vulnerable dependency in your projects is if that vulnerability is already known. People report vulnerabilities to Mitre CVE which will just assign a CVE number, and to Nist NVD database with score vector and extended info. That is the one you want to mainly query, but there more databases you can consider like osv.dev, GitHub advisory database, or Go Vulnerability Database. There are Linux distribution specific databases (Debian, Red Hat, SUSE, Ubuntu), and privative ones like VulnDB, but you may see a lot of repeated info also reported to NVD anyways.
But you shouldn’t be manually reading every single day vulnerability databases on your own. You can use a container image scanning tool to list all known dependencies on your containers and match that list with the NVD or other vulnerability database. Some open-source scanners for command line are Trivy, Grype, Snyk; and free tool Docker Scout. The first time you do this, you will be surprised to learn how many vulnerabilities are out there, so you better filter for the high or critical ones that have a known exploit.
Remember the sooner you scan the better, developers when test-building images, on build pipelines so very vulnerable images are stopped, and when publishing to a container registry. But even after your container image has long been built, new vulnerabilities may be discovered. Then you want to continually scan existing container images on registries as well as on running hosts and clusters. Most scan solutions in this latter case rely on having an SBOM (Software Bill of Materials), a list of all known software on the image, as the list shouldn’t change, so they can continuously keep matching the SBOM list to updates of the vulnerability database to warn on newly discovered vulnerabilities. You shouldn’t have to bother how SBOMs work at all, an enterprise solution like Sysdig, Aqua, Prisma, Lacework, or Snyk should take care of that. You just have to set up scanning at every step, establish acceptance criteria, and centralize reporting of findings.
The first time you are warned of an important vulnerability (high or critical with known exploits, for example), two things can happen:
- You are using the vulnerable dependency for the first time
- You already were using the vulnerable dependency
Using vulnerable dependency for the first time
You are just using that dependency with the vulnerability for the first time. You should research if it has been recently discovered, and if you can use an alternate (older) version that is less vulnerable until the newer one gets fixed. If the package is in general in a very bad situation vulnerability-wise on all versions, consider using a completely different dependency that can do the same job.
You already were using the vulnerable dependency
If you already were using the vulnerable dependency. Then other possible options arise.
There is an upgraded version that is known to fix the vulnerability (it would be indicated in the vulnerability database). Then just rebuild the container image using this version, following all the test processes that you should have in place to make sure everything works as expected. In this process, you may want to also upgrade other dependencies, but be careful. If you change a lot of packages, you may also be introducing new vulnerabilities to consider, or your tests may show that your software no longer behaves the way it should. To be able to do this in a controlled manner, it’s important to version-fix the dependencies in your build process, so it’s easier for you to choose what to upgrade, and maybe even to have your own copy of the original dependencies you use, in your own controller artifact registry (like Artifactory, GitHub Actions Artifacts, AWS Artifact Repository, Azure Artifact), Google Artifact Registry. It is also useful to separate the build process by creating or using a base container image that is reliable and you trust, and on a separate step additional layer(s) for the very specific software of that container, that way it’s easier to keep the base consistent if you don’t need to change its packages. Reproducibility is a very important concept for security and stability. Also automating rolling out new releases will reduce the time it takes you from detection to complete vulnerability removal of your production workloads.
There is no upgrade version that fixes the vulnerability, or the alternative is a different mayor (or minor) version that breaks some functionality. In this case, again you have two options.
You think you need to remove the vulnerable dependency no matter how. You should then replace it with a very different version, or even a different dependency that provides a similar set of features. This can be arduous and coding-intensive, where having good tests is essential. Also good planning in separating in-layer functionality instead of calling directly the dependency will help replace it. Balance is the key, you can’t make everything abstract or code will be very convoluted even for simple things (I’m looking at you, enterprise Java).
The vulnerability doesn’t look so serious, or you think known mitigations may be put in place to prevent it from being “activated” or “reached”. To arrive at this conclusion, study the Common Vulnerability Scoring System (CVSS) vector that describes its behavior, the global score, and if there is a known exploit link in the CVE information page. In this scenario, you have the advantage of the vulnerability already being known and researched. If it relies on some specific network connection or unfiltered input, you may add some network filter with specific blocking rules (like Snort) or a security web proxy (like OWASP ZAP). You may not need to write your own rules, but keep an eye on runtime behavior and seek updated rules if the vulnerability is further analyzed to be activated in new ways.
3. That’s (not) all folks
No, no… that is not all. This is enough for vulnerabilities in containers, but there are still general recommendations to follow:
Your own coded software may have insecure code practices. Ensure you define a good architecture and use some code quality analysis tools like SonarQube.
Managing secrets and certificates, who creates them, how to deliver them to your workloads in a secure way, how to revoke and rotate tokens, etc, would also deserve its own blog post. Never allow any kind of secret token or file in your Dockerfile or container content. Kubernetes secrets have been criticized for initial lack of strong security like not keeping them in memory instead of disk, not using encryption at rest, loading them only to nodes that didn’t need them, and poor document explanation of how they are secure. Those days are over, but Kubernetes secrets is just a delivery mechanism, you still have a source to store, manage, deliver them to your cluster, and update and revoke secrets and certificates. There is where open-source tools like Vault or Cert Manager can help you. Also, Cloud providers have specific services that you can leverage (AWS, GCP, Azure), but with vendor lock-in. You can set your secrets to be mounted as environment variables, or files, which is preferable. Anyone that can list processes on the host would be able to see all environment variables (and secrets) of a those processes. But when they are mounted as files, they use an in-memory filesystem volume so they are never persisted on disk, and getting to that volume is harder in case a malicious actor tries to exfiltrate secrets.
Your workloads unchecked could exhaust the resources of the cluster, which may be triggered during a denial of service attack for a single service, but results in the whole cluster going down. What is worse, they could prevent security software on the cluster from running. Learn to use and enforce setting resource requests and limits and limits to avoid that. But be careful, a CPU limit on your workloads will make them get throttled when reaching the maximum allocated, but for memory, Kubernetes will repeatedly kill the offending pods with OOMKilled status (OOM = Out Of Memory). Some people say it’s better not to use limits, in any case, it’s a very tricky thing to set properly, which relates to the next point.
Observability is heavily related to security. If you see a sudden increase in CPU activity, a cryptominer may have started running in your hosts. If the network activity is the one going up, data exfiltration may be happening, or your cluster may start to be used for a denial of service attack. And sudden increased disk activity may be a ransomware attack going through files and encrypting them. The most recognized open-source tools for that are Prometheus for scraping, storing, and querying time series metrics, Alertmanager for triggering alerts based on your metric rules written in PromQL language, and Grafana for displaying dashboards. Install all at the same time using this helm chart. You can complement that with Robusta, also open-source, to make sure the information for troubleshooting incidents easily arrives to developers. When handling many cloud accounts, each possibly with many clusters can be a real challenge that requires enterprise tools. In this case, Sysdig is exceptional as it not only is a top-tier observability tool, but also a top-tier security one all in the same product.
For specific files, you can query APIs to know if they have been tampered with extra malicious code, like VirusTotal API or CIRCL hashlookup. You can also use open-source ClamAV to check for malware files, something no vulnerability scanner does, but bear in mind it’s very rare to find any at all on container images (maybe on Windows images?). In any case, don’t blindly trust vulnerability databases, even for things that are reported on NVD, there are important claims of inaccuracy, and if you are trying to report a CVE for a software vendor that is a Certified Numbering Authority (they can assign CVE ids), like it’s the case for Microsoft: [they may argue or ignore you preventing the report to move forward](https://www.pluginvulnerabilities.com/2023/01/09/cves-process-for-disputing-a-claimed-vulnerability-is-currently-broken/.
When your focus is on a secure software supply chain, you want to make sure you have under control all code that gets executed into your cluster. From the dependencies your developers are using, how containers are built, and making sure what you are running is the same thing you built in the first place. On top of vulnerability scans to evaluate dependencies as explained, you may want to sign your container images using cosign for keyless signing, and push the signature to your registry, so it can be verified later before deploying it. That is just the first step in **zero-trust security architecture. You can leverage the SLSA standard that defines additional levels to secure the attestation and provenance of how your software is built and used. But how do you trust that your provisioned infrastructure and cloud components are who they say they are for this interaction? To solve that, you can look into SPIFFE (Secure Production Identity Framework for Everyone) standard and the implementation provided by SPIRE (SPIFFE Runtime Environment).
If you want a thicker isolating layer for your containers, you can try to run them using gvisor as an extra layer between them and the kernel, but beware that not all containers are compatible with it, as it will only allow a subset of system calls. Another isolating mechanism you can try is [kata containers, which will execute each one on its own virtual machine, but with an important performance hit. Lastly, if you want paramount isolation where not even the orchestrator or a cloud provider can know what is running in your cluster, look for confidential containers.
Thanks
Thanks to Flaquivurus for the cover photo.
Conclusion
Sorry for taking so long on completing this post series. I was busy with my new job, and as I already are speaking daily about cloud, container and Kubernetes security full time, I wanted to write about other topics. But it was important to first close this chapter. I have the feeling that I will write less about security in following posts.
Vulnerabilities are a reality that you will face, so you better plan for that in your software project. Be it dealing with unknown ones, mitigating what is known but can’t be fixed, or making things easier to upgrade, test and roll out.
If there is some information I missed in this article, or you just want to chat with me, let me know.
And if you found this information extremely useful to you, why not let others know? Share it in a tweet, or invite me to coffee!
Vicente Herrera is a software engineer working on cloud native cybersecurity (cloud, containers, Kubernetes).
His latest job is cybersecurity specialist at Control Plane, and previously was Product Manager at Sysdig.
He is the published author of Building Intelligent Cloud Application (O’Reilly, 2019) about using serverless and machine learning services with Azure.
He has been involved in several research projects for using AI on healthcare and automatic code generation.